
 Save
Save
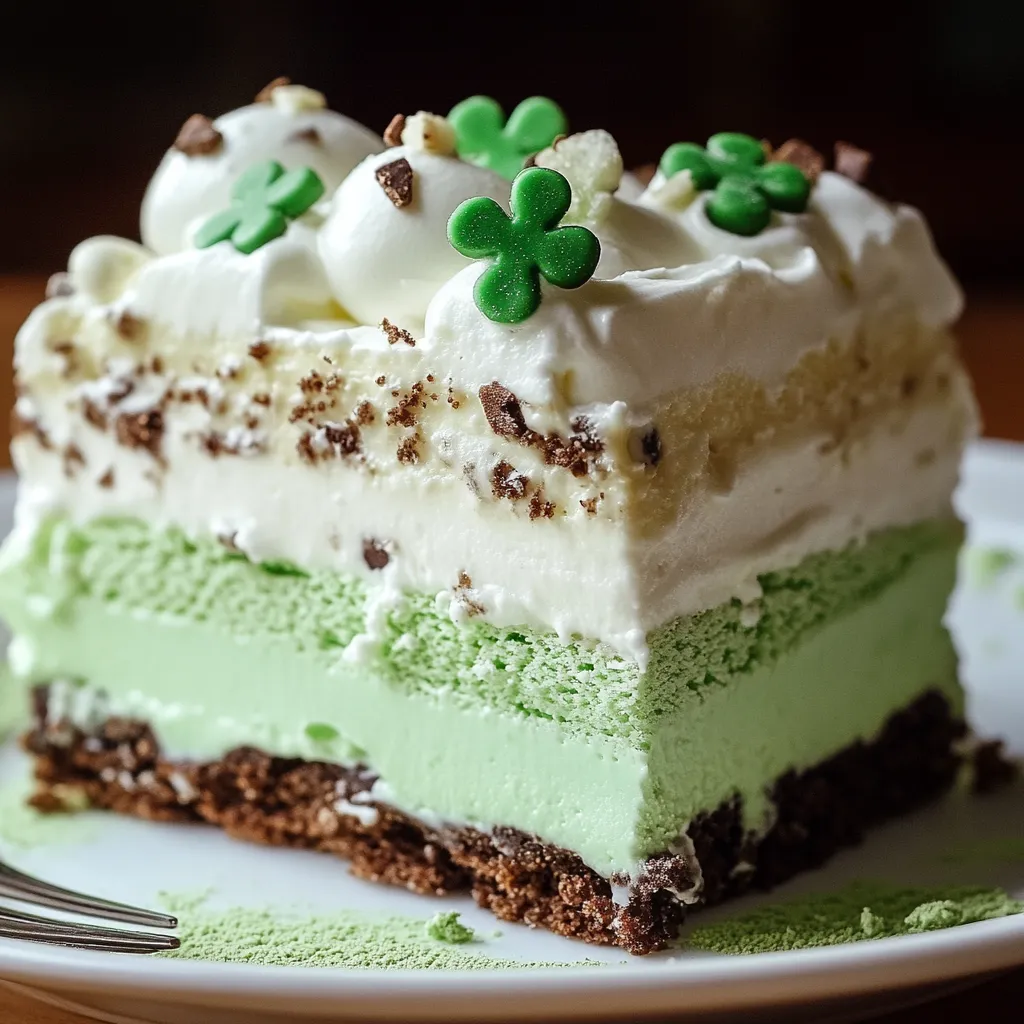
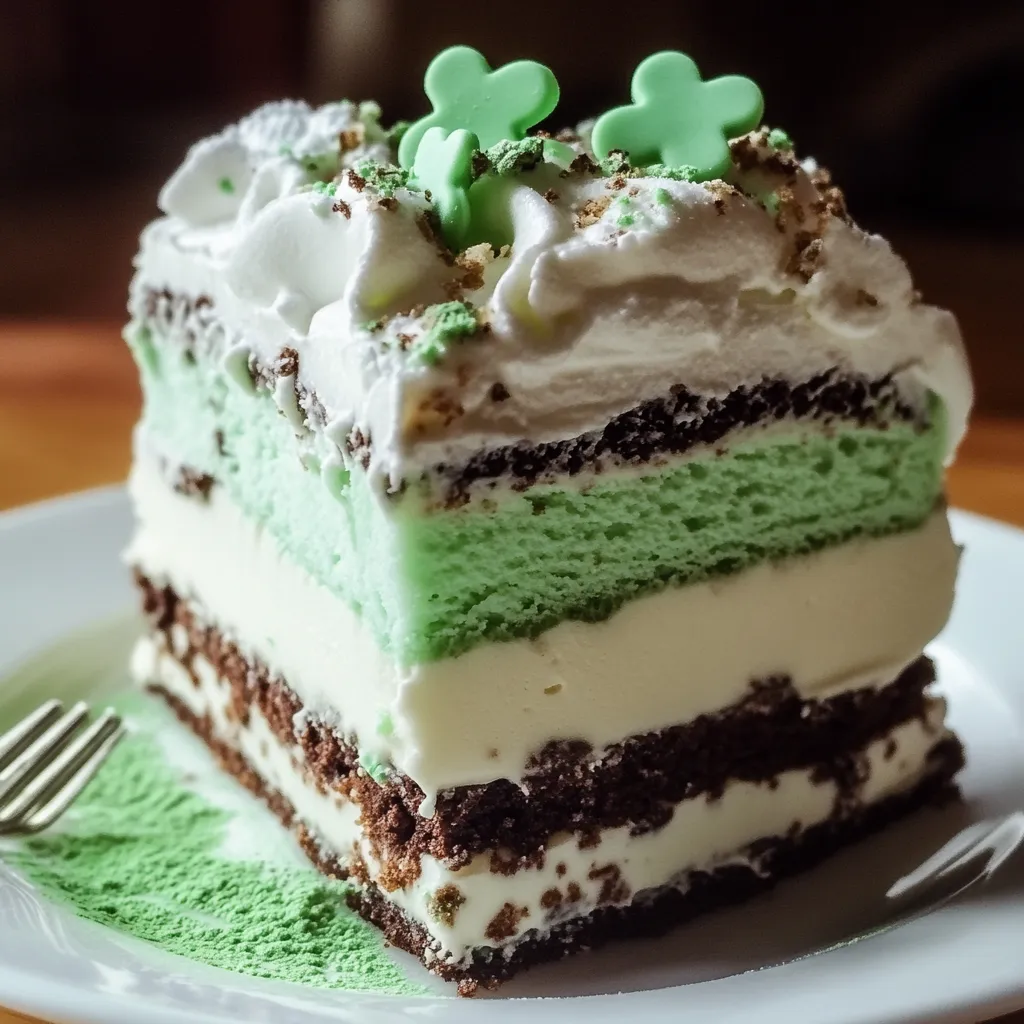
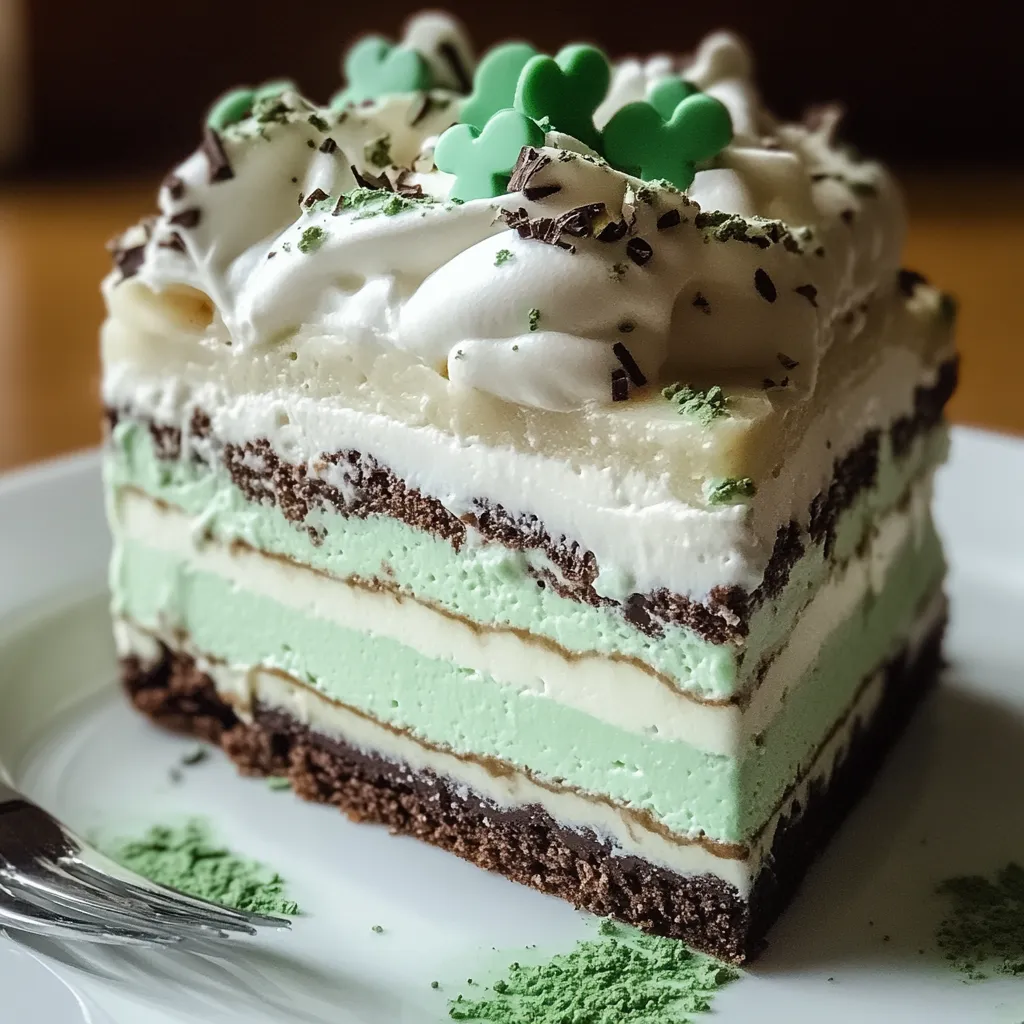
Smooth, velvety tiers of mint-flavored goodness make an addictive no-bake delight that calls to mind the popular seasonal drink. This shamrock sweet stack pairs a crunchy base, silky cream cheese, and minty pudding into a standout layered treat that adds festive flair to any party without needing your oven at all.
I whipped this dessert up for my kid's St. Patrick's Day school event, and it vanished quicker than anything else on the dessert table. What started as just a holiday treat has turned into a family favorite we crave all year when we want something cool and crowd-pleasing. The pretty green shade brings smiles right away, and those different textures keep everyone saying they'll have "just a tiny bit more." Even my hubby, who usually stays away from minty sweets, can't help grabbing seconds of this creamy masterpiece.
Stellar Ingredient Choices
- Chocolate Sandwich Cookies: Form a dark, chocolatey base that works beautifully with the mint layers on top
- Butter: Holds the cookie bits together for a solid foundation that cuts cleanly
- Cream Cheese: Adds a zesty richness that cuts through the sweetness in other layers
- Powdered Sugar: Melts right into the cream cheese for a perfectly smooth mix without any sugar grains
- Whipped Topping: Brings airiness throughout while keeping everything stable
- Instant Vanilla Pudding: Creates a firm middle section that won't fall apart when served
- Whole Milk: Starts the pudding setting process and boosts the overall creaminess
- Mint Extract: Provides that classic shamrock shake taste that defines this dessert
- Green Food Coloring: Turns this into a fun visual treat everyone will notice
- Mint Chocolate Pieces: Give little bursts of texture and extra flavor throughout
Assembling The Sweet Wonder
- Build Your Base:
- Grind chocolate sandwich cookies into tiny crumbs using your food processor. Mix with melted butter until it looks like damp sand. Push firmly into your 9×13 dish, making an even, flat layer. Pop in the fridge for 15 minutes to firm up.
- Whip Up The Creamy Base:
- Mix soft cream cheese with powdered sugar until it's light and bump-free. Carefully fold one-third of the whipped topping in with a rubber spatula, trying not to knock out the air. Spread this mix evenly over your cold crust, smoothing the top flat.
- Prepare The Mint Magic:
- Stir instant vanilla pudding with cold milk for two minutes until it starts thickening. Drop in mint extract and green coloring, adjusting until you get that perfect mint kick and bright shamrock shade. Let it sit about five minutes until slightly set.
- Layer The Green Center:
- Gently spread the mint pudding over your cheese layer, using a flat spatula to make it even without disturbing what's below. This green layer gives the dessert its signature look.
- Top It Off:
- Spread the rest of your whipped topping over everything in gentle swirls to make it look fluffy and cloud-like. This final layer serves as the perfect backdrop for decorations.
- Add The Finishing Touch:
- Scatter chopped mint chocolate pieces, crushed mint cookies, or chocolate shavings across the top, either clustering them in the middle or making a pattern. This final step adds crunch and hints at the flavors inside.
- Let It Rest:
- Chill your creation for at least two hours or overnight so all layers can set properly and flavors can mingle. This waiting period means you'll get clean slices and better taste.
- Cut And Enjoy:
- Slice into squares using a sharp knife, wiping it clean between cuts for the prettiest servings. Keep it cold for the best texture and flavor.
 Save
Save
We really go crazy for this dessert during hot summer days when its cool, refreshing taste hits the spot. I've tried different cookies for the bottom layer and found that chocolate graham crackers give a softer chocolate flavor when you don't want something too strong. For grown-up parties, I sometimes add a tiny splash of peppermint schnapps to the pudding layer for a fancy twist that always gets compliments.
I actually came up with this idea when my kids kept asking for shamrock shakes after they weren't available anymore. This homemade version lets us enjoy that special flavor anytime, and making it as a dessert means it's perfect for sharing at get-togethers.
Perfect Companions
This bright dessert stack really shines when served alongside treats that boost its refreshing quality. Try it with hot coffee or cocoa to balance the cool mint with something warm. At dessert parties, put it next to chocolate-covered strawberries and bite-sized brownies for different textures and tastes. For St. Patrick's Day parties, serve with Irish coffee for the adults or green milk for kids to keep the theme going. In summer, add some fresh berries or mint leaves on top for a seasonal touch.
Mix It Up
Switch things around with this flexible dessert while keeping its pretty layered look intact. Try a double-chocolate version by using chocolate pudding instead of vanilla in your mint layer for deeper flavor. For a cookies-and-cream twist, mix crushed chocolate sandwich cookies into the cream cheese part before spreading it. During Christmas, swap in a bit of peppermint extract instead of mint and sprinkle crushed candy canes on top. If you're a chocolate fan, pour some melted chocolate over the top before adding your mint chocolate pieces.
Keeping It Fresh
Keep your shamrock treat tasting amazing with the right storage tricks. Cover any leftovers tightly with plastic wrap pressed right against the surface so moisture doesn't make the top get soggy. It'll stay good in your fridge for up to four days, though the crust will get a bit softer over time. To keep it longer, freeze single portions in sealed containers for up to a month—they'll still taste great after thawing overnight in your fridge. If you're making it ahead for a party, prep everything but don't put it all together more than 24 hours before serving for the best mix of blended flavors and nice texture.
I first put together this shamrock sweet stack while trying to bring some cheer during a gloomy March. The bright green color and cool mint taste seemed to instantly lift everyone's spirits, becoming a family favorite right away. What makes this dessert extra special isn't just how pretty it looks or how yummy it tastes, but all the memories we've made around it—from St. Patrick's Day parties to summer gatherings when its refreshing nature feels so welcome. There's something truly magical about cutting through those perfect layers and watching faces light up as I hand out plates. Food has this amazing power to create moments of happiness, and this shamrock treat has become our go-to whenever we need a little extra sweetness in our day.
 Save
Save
Recipe FAQs
- → Do I need green food coloring?
- Nope! The green is just for looks. You can go without coloring for a plain mint layer or use natural options like matcha.
- → How early can I prepare this?
- You can make it up to 2 days ahead. Keep it chilled and covered. While the crust softens a bit, the flavors blend and get better!
- → Can I store leftovers in the freezer?
- For sure! Freeze portions for up to a month. Thaw in the fridge for a couple of hours before digging in.
- → What can I swap for Cool Whip?
- Try whipped cream! Beat 1 1/2 cups of heavy whipping cream with 3 tablespoons of powdered sugar until it peaks. Just know it melts a bit faster.
- → Can I use pudding in different flavors?
- Of course! Vanilla is mild, but you can try chocolate for a richer taste or pistachio for an extra green twist.