
 Save
Save
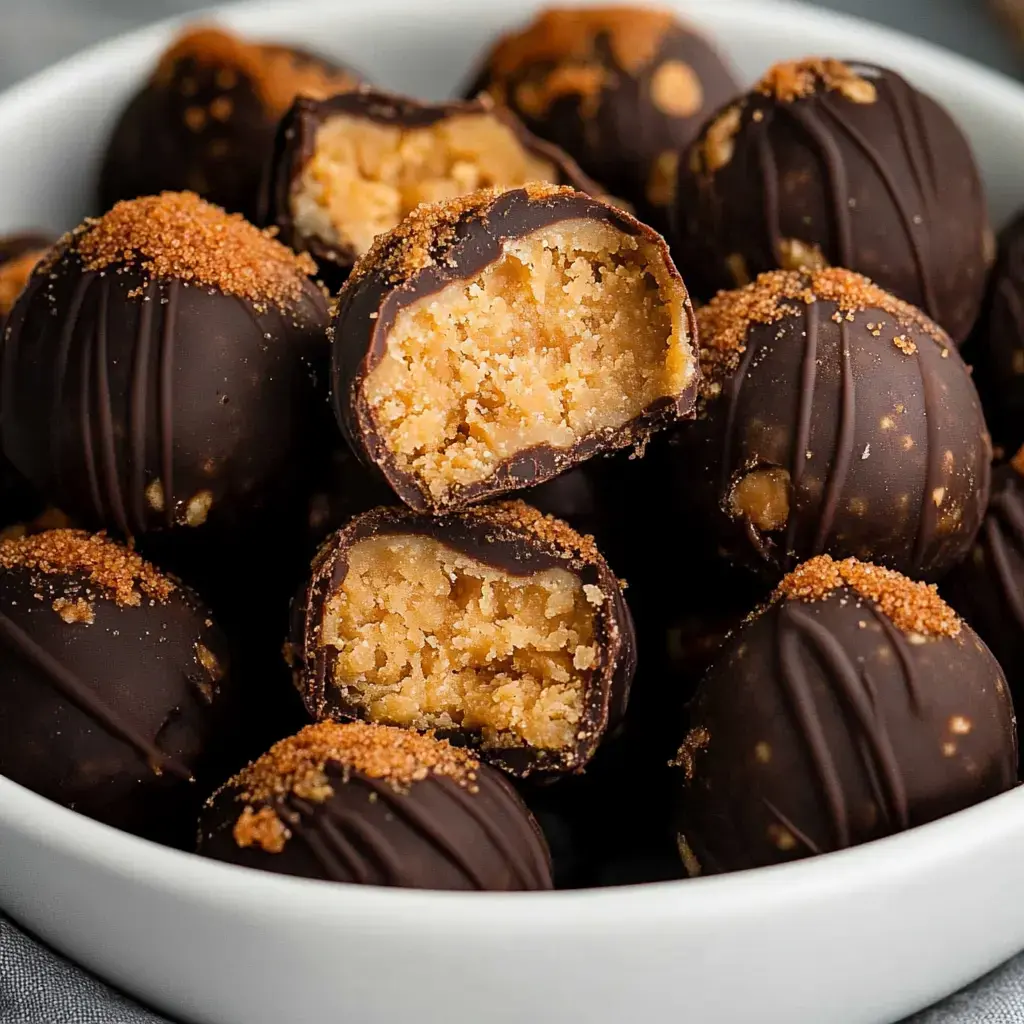
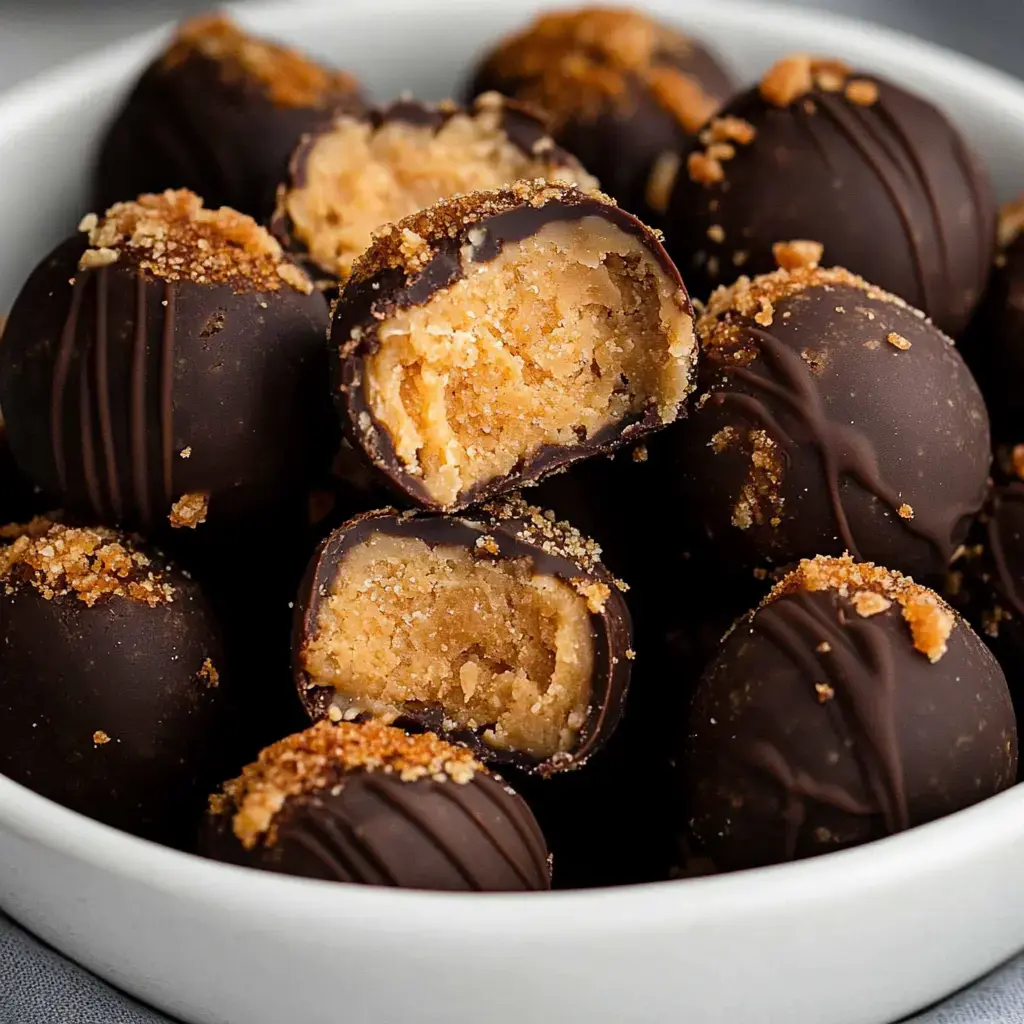
OMG, you gotta try these Butterfinger Balls! I stumbled upon this recipe during my kitchen experiments and now my family begs for them constantly. There's something magical about mixing smooth peanut butter with crunchy graham bits and that classic Butterfinger texture, all wrapped up in velvety chocolate goodness.
These Vanish From The Plate
I can't keep these around when I make them for parties - they're grabbed up within seconds! They're crazy easy to throw together and don't need any baking at all. I've started keeping some in my freezer for when friends pop by or when I need a sweet snack. My whole neighborhood has put in standing orders for block parties now.
Your Shopping List
- Peanut Butter: 1 cup, pick smooth for silkiness or chunky if you want extra texture.
- Butter: ½ cup, make sure it's unsalted and room temp so it mixes well.
- Vanilla Extract: 1 tsp, this gives that wonderful background flavor.
- Powdered Sugar: 2 cups, run it through a sifter for the smoothest results.
- Graham Cracker Crumbs: 1 cup, crush them up fine for the perfect texture.
- Butterfinger Candy Bars: 4 bars, smashed up for mixing in and sprinkling on top.
- Chocolate Bark: 12 oz, melted down for dunking those yummy balls.
Creating Tasty Wonders
- Blend Your Foundation
- Grab a big bowl and beat the peanut butter, butter, and vanilla until it's nice and smooth. Slowly add the powdered sugar while scraping down the bowl sides.
- Get That Crunch Factor
- Mix in the graham cracker crumbs and smashed Butterfinger pieces until everything's well combined.
- Roll 'Em Up
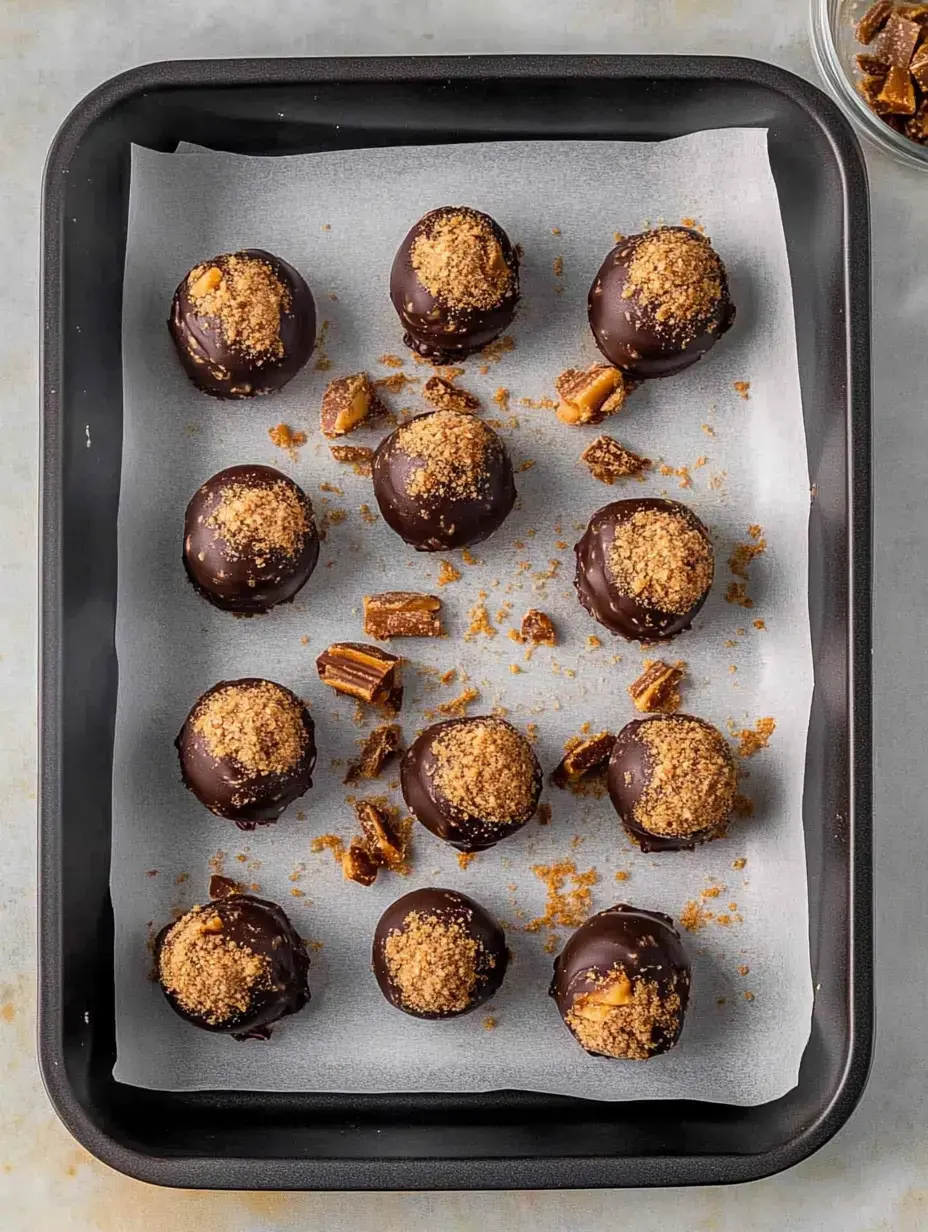
- Use a cookie scoop to make balls about 1 ½ tablespoons each, then roll them between your hands until smooth. Put them on some parchment paper and pop in the freezer for 30 minutes.
- Chocolate Bath Time
- Melt your chocolate bark and dip each ball using a fork or toothpick. While still wet, sprinkle more crushed Butterfinger on top or add some fancy drizzles.
- Patience Pays Off
- Let them firm up on your parchment paper either on the counter or in your fridge before you dig in.
 Save
Save
Storage Smarts
These treats stay awesome in the fridge for weeks in an airtight container, though they hardly last a day at my place! I put wax paper between layers so they don't stick together. If you want to save some for later, just toss them in the freezer and grab them whenever you need a chocolate fix.
Mix It Up
I've gone wild trying different candy bars in this recipe. Just last week I swapped in Snickers and they turned out fantastic. My family goes nuts for white chocolate coating too. When my kid has friends over, we toss on bright sprinkles to make them extra fun.
Party Favorite
These started as Christmas treats but now they show up at every celebration from baby showers to wedding receptions. I love that I can make them way ahead of time when I'm planning big events. Guests think they took forever to make but between us, they're super quick!
 Save
Save
Insider Tricks
After making tons of batches, I've learned a few things. If your mix gets too gooey, stick it in the fridge for 15 minutes before you start rolling. When you're melting chocolate, go 30 seconds at a time in the microwave and stir between. And seriously, ditch the toothpick for dipping - a fork works way better.
Kitchen Buddies
My kids can't wait to join me when I make these. They're the best at smashing candy bars and forming the balls. Sure, the kitchen looks like a tornado hit it afterward, but seeing them carefully add those toppings makes my heart melt. They're learning to enjoy cooking too.
Make Them Fancy
When I want to impress, I'll put them in cute paper cups on my grandmother's serving tray. I found some tiny gift boxes at the craft shop that are perfect for giving them away. A little zigzag of different colored chocolate on top makes them look like they came from a fancy shop.
 Save
Save
Treats For All
I've tweaked this recipe so everyone can enjoy them. My neighbor can't eat gluten so I use gluten-free graham crackers in her batch. For my sister who's vegan, I swap in dairy-free chocolate and it works great. There's nothing better than watching everyone enjoy the same treat together.
Tasty Combos
These balls taste amazing with a steaming cup of coffee on lazy Sunday afternoons. When my book club comes over, I serve them with fresh strawberries and raspberries. Something about the fruit and chocolate together just works so well.
Gift From The Heart
These have become what I'm known for during the holidays. I pack them in festive tins with recipe cards I write out by hand. My friends start dropping hints about them as soon as Thanksgiving is over. Homemade treats just feel more special during holiday season.
Crowd Pleaser
When I need something that won't let me down for parties, this is my top pick. They travel really well and don't melt or go bad if they sit out for a while. I always bring extra recipe cards because someone always asks how to make them.
 Save
Save
Ready For Anything
I've learned my lesson about running out, so now I keep a hidden batch in the freezer. They thaw super fast and have saved me so many times when friends drop by without warning. It feels great to pull out something homemade when company comes calling.
Recipe FAQs
- → Which type of peanut butter works best?
Choose smooth peanut butter like Jif or Skippy. Natural types are too oily and could change the texture.
- → How should these treats be stored?
Keep them fresh in the fridge inside an airtight container. They'll last for up to seven days.
- → What chocolate is best for coating?
Chocolate bark is your best bet for an even finish. A mix of bark and chips also works, or you can use tempered chocolate chips.
- → Can these be made ahead of time?
Definitely! Make them early and refrigerate. They're great to prep before events or festive occasions.
- → What toppings are good to add?
Sprinkle extras like crushed Butterfingers, festive sprinkles, or a pinch of sea salt on top while the chocolate's wet.