
 Save
Save
Homemade Thin Mints have saved me countless times when cravings strike long after Girl Scout cookie season ends. This recipe gifts you that classic minty crunch with real-deal chocolate and a satisfying bite. They are serious crowd-pleasers for holiday parties, summer picnics, or binge-watching your favorite shows.
I first made these for a cookie swap at work and watched everyone light up after their first bite. They taste exactly like the bright green box version but somehow even more delicious.
Ingredients
- Butter unsalted at room temperature: Essential for a tender cookie choose a European style for extra richness
- Sugar: Creates crisp edges and balances the mint
- Large egg: Gives binding power and structure to the dough
- Vanilla bean paste: Brings subtle warmth and depth to the chocolate base use pure extract if you cannot find paste
- Peppermint extract: Delivers that classic cooling zip be sure to select pure peppermint not spearmint
- All-purpose flour: Gives the cookie form and crunch sift for a lighter crumb
- Cocoa powder: Intensifies the chocolate flavor look for Dutch-processed for the best color and taste
- Baking powder: Lightens the cookies just enough for a delicate snap
- Salt: Balances flavor and enhances chocolate
- Semi-sweet chocolate chips: For the coating rich flavor and easy melting quality matters try a brand that lists cocoa butter as a top ingredient
- Vegetable oil: Ensures a glossy coat on each cookie avoid strong flavored oils
Step-by-Step Instructions
- Make the Dough:
- Cream butter and sugar in a large mixing bowl with an electric mixer for about three minutes until light and fluffy This creates a delicate base and sets the stage for a crisp cookie
- Add Flavors:
- Beat in the egg vanilla bean paste and peppermint extract making sure everything is smooth and unified The mint should smell fresh but not overpowering
- Sift and Combine Dry Ingredients:
- In another bowl sift together flour cocoa powder baking powder and salt Use a spoon to whisk until the mixture is all one color The sifting step means your cookies will not be tough or dense
- Blend Wet and Dry Ingredients:
- Gradually add the flour mixture to the butter mixture mixing on medium slow until no dry flour remains Scrape the sides so nothing is lost
- Roll and Chill:
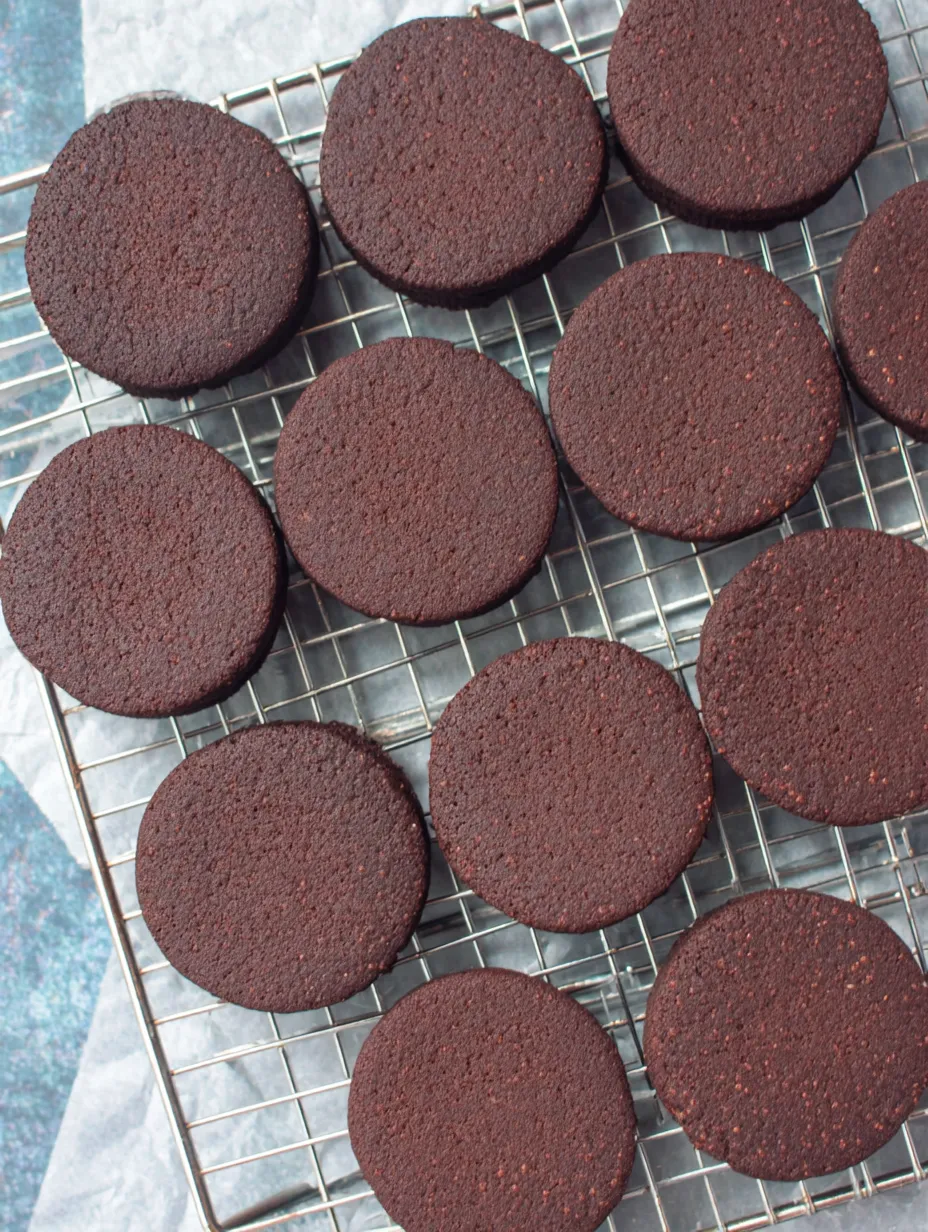
- Lay out parchment paper on a clean surface and divide dough into two equal parts Place one half on the parchment cover with another sheet and roll out to one quarter inch thick Repeat with second half Keeping the dough between parchment prevents sticking Slide both sheets onto trays and chill in the fridge for at least two hours Overnight chilling works great if you want to break up the work
- Cut and Bake:
- Preheat your oven to 350 degrees F Using a two inch round cutter stamp out circles as close together as possible Re roll scraps for more cookies Arrange circles on a parchment lined baking sheet they can be closely spaced as they will barely spread Bake for eight minutes until just firm
- Cool Completely:
- Let cookies sit on the baking tray for five minutes then use a spatula to gently move them to a wire rack Make sure each cookie is fully cool before you coat them
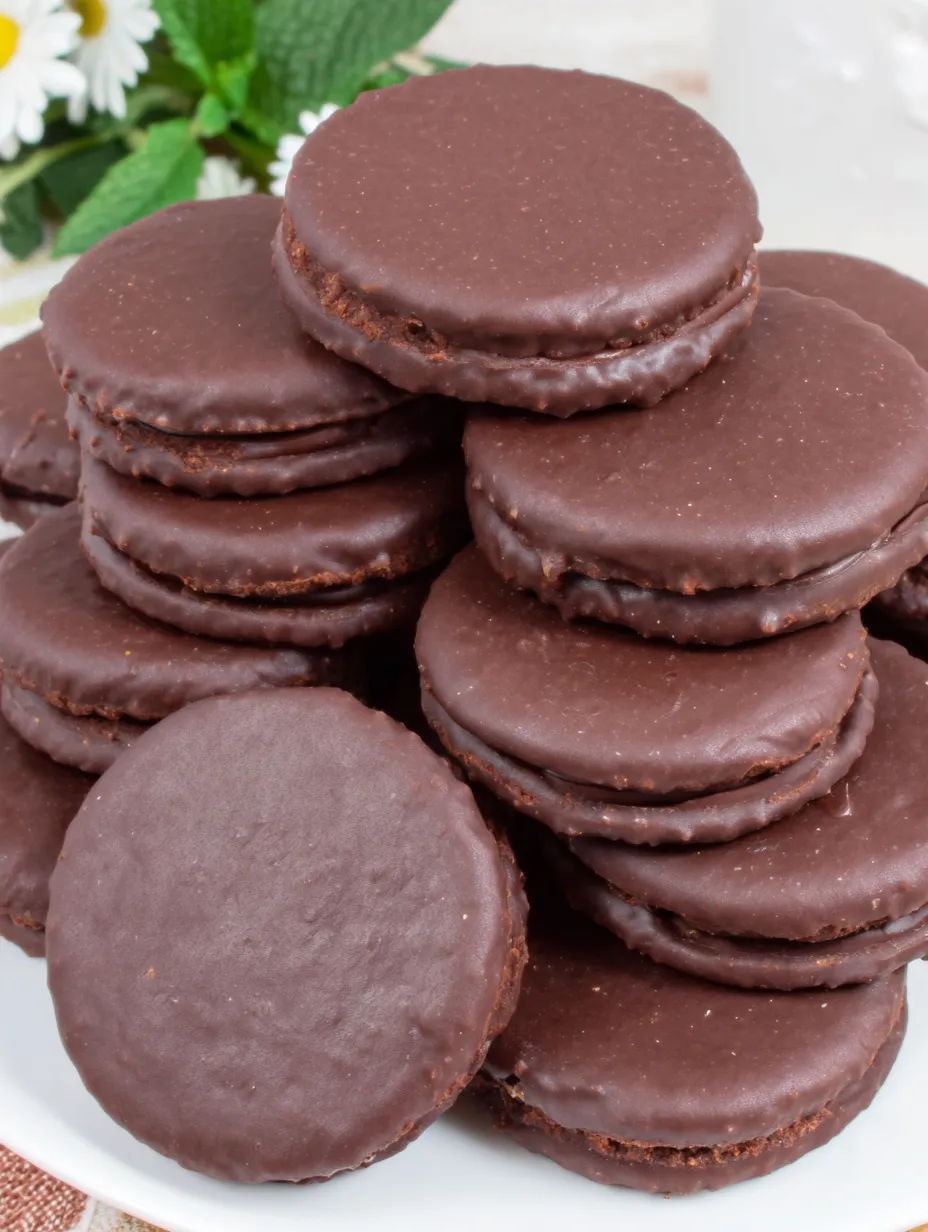
- Prepare Chocolate Coating:
- Add chocolate chips to a microwave safe bowl Heat in thirty second bursts stirring in between until melted and smooth Stir in vegetable oil and peppermint extract Mixing well ensures a glossy coating
- Dip the Cookies:
- One at a time submerge cooled cookies in melted chocolate Use a fork to lift out allowing excess chocolate to drip before placing on parchment to set The coating will harden at room temperature or you can speed things up in the fridge
 Save
Save
The star ingredient for me is peppermint extract It brings memories of helping my mom dip cookies for Christmas trays and the smell alone makes the kitchen feel joyful
Storage Tips
Keep extra cookies in an airtight container with layers separated by parchment paper They will stay fresh for up to two weeks at room temperature For long term storage keep them in the freezer where they will taste just as crisp months later There is something magical about pulling a chilled Thin Mint straight from the icebox
Ingredient Substitutions
Swap in gluten free flour if needed Just make sure it is a cup for cup blend with built in binder like xanthan gum For a darker bittersweet taste use a mix of dark chocolate and semi sweet chips in the coating If you are out of vanilla bean paste use pure vanilla extract instead
 Save
Save
Serving Suggestions
Try these with a mug of strong coffee or crumbed over ice cream for a night in I love to stack a few in lunchboxes or as a thank you gift for neighbors If you really want to wow guests sandwich a scoop of mint chip ice cream between two cookies and freeze for homemade ice cream sandwiches
Cultural Context of Thin Mints
Thin Mints are an iconic American treat first introduced by the Girl Scouts in 1959 They quickly became their best selling cookie inspiring countless bake sales and kitchen experiments This homemade version means you can relive cookie season nostalgia any time of year
Recipe FAQs
- → Can I use natural cocoa powder instead of Dutch-process?
Yes, but Dutch-process delivers a richer color and smoother chocolate flavor. Natural cocoa works, but final cookies may be lighter in taste and color.
- → Is chilling the dough necessary?
Chilling is essential. It firms the dough, making it easier to roll thin and ensuring the cookies bake with a nice crisp snap.
- → How do I melt chocolate without burning it?
Microwave chocolate in short bursts and stir between each interval, or use a double boiler to gently melt for a smooth coating.
- → Can I substitute peppermint extract?
Peppermint extract adds the signature mint flavor, but you could try spearmint or omit for pure chocolate cookies, if preferred.
- → How should I store the cookies after coating?
Once the chocolate sets, store the cookies in an airtight container at room temperature or in the fridge for longer freshness.